
Can I upload my inventory items?
Yes — and Seller Ledger now offers a few different ways to bulk-upload inventory-related data via CSV, depending on how you're tracking inventory and what you're trying to accomplish.
This article walks through all three options so you can pick the one that fits your situation:
- If you're using continuous (item-level) inventory tracking, you have two upload options:
- Upload item details for a single inventory purchase
- Upload multiple inventory purchases at once (great for switching from a spreadsheet)
- If you're using cash-based inventory tracking, you can:
- Upload a list of purchases and have them recorded as Cost of Goods Sold expenses
If you're not sure which inventory tracking method you're using, check out What is "continuous" inventory tracking?, What is "periodic" inventory tracking?, and What is "cash-based" inventory tracking?.
For continuous (item-level) inventory tracking
If you have inventory tracking turned on and you're tracking costs at the item level, there are two different CSV upload options available to you.
Option 1: Upload item details for a single inventory purchase
This option is ideal when you already have an inventory purchase transaction recorded in Seller Ledger (for example, a purchase you made through a connected bank or credit card that you categorized as Inventory) and you want to break out the individual items included in that purchase.
Before you can use this option, two things must be true:
- You have inventory tracking turned on (this option is not available for cash-based tracking).
- You have at least one inventory purchase transaction already recorded in Seller Ledger. This most often happens when you categorize a bank or credit card transaction as Inventory, but can also happen when you manually add an inventory purchase. You'll know you're set up when you see a transaction like this under Inventory → Balances or Inventory → Purchases:

How to upload the item details:
- Find your inventory purchase under Inventory → Purchases and click Add Details.
- On the screen that appears, under How do you want to add items?, select Upload CSV .
- Click Choose File and select your CSV.
- Click the Upload & parse CSV button.

If you need to make changes to the uploaded values, do so on the bext screen.

- Click Save purchase.
CSV format:
Your file needs exactly four columns, in this order, with these header names (lowercase):
skuproduct namequantitytotal cost

A few important notes:
- The total cost should be the amount for all items in that row combined, even if the quantity is greater than 1. Seller Ledger will calculate the per-item unit cost for you.
- Do not include commas inside your numbers (e.g. use
1000, not1,000). - All items in the file will be attached to the single inventory purchase transaction you clicked into.
For more detail on adding item costs to a purchase (including manually), see How do I record item costs when I purchase inventory?.
If you enter an opening balance when turning on continuous inventory tracking, you can use this upload option to upload all of the items in your beginning-of-year balance amount. Just make sure that the total value of all items equals your opening balance entry.
Option 2: Upload multiple inventory purchases at once
This is a newer option that's especially helpful if you're switching from a spreadsheet-based system to Seller Ledger, or if you have a large backlog of inventory purchases you want to load in one shot.
Instead of attaching items to an existing purchase transaction, this option lets you upload a CSV that includes both the purchase-level details (vendor, date, etc.) and the item-level details (SKU, product name, quantity, cost) — creating multiple inventory purchases in a single import.
How to upload multiple purchases:
- Go to the Inventory tab.
- Click the Inventory Uploads sub-tab.
- Choose your CSV file and click Upload purchases CSV.
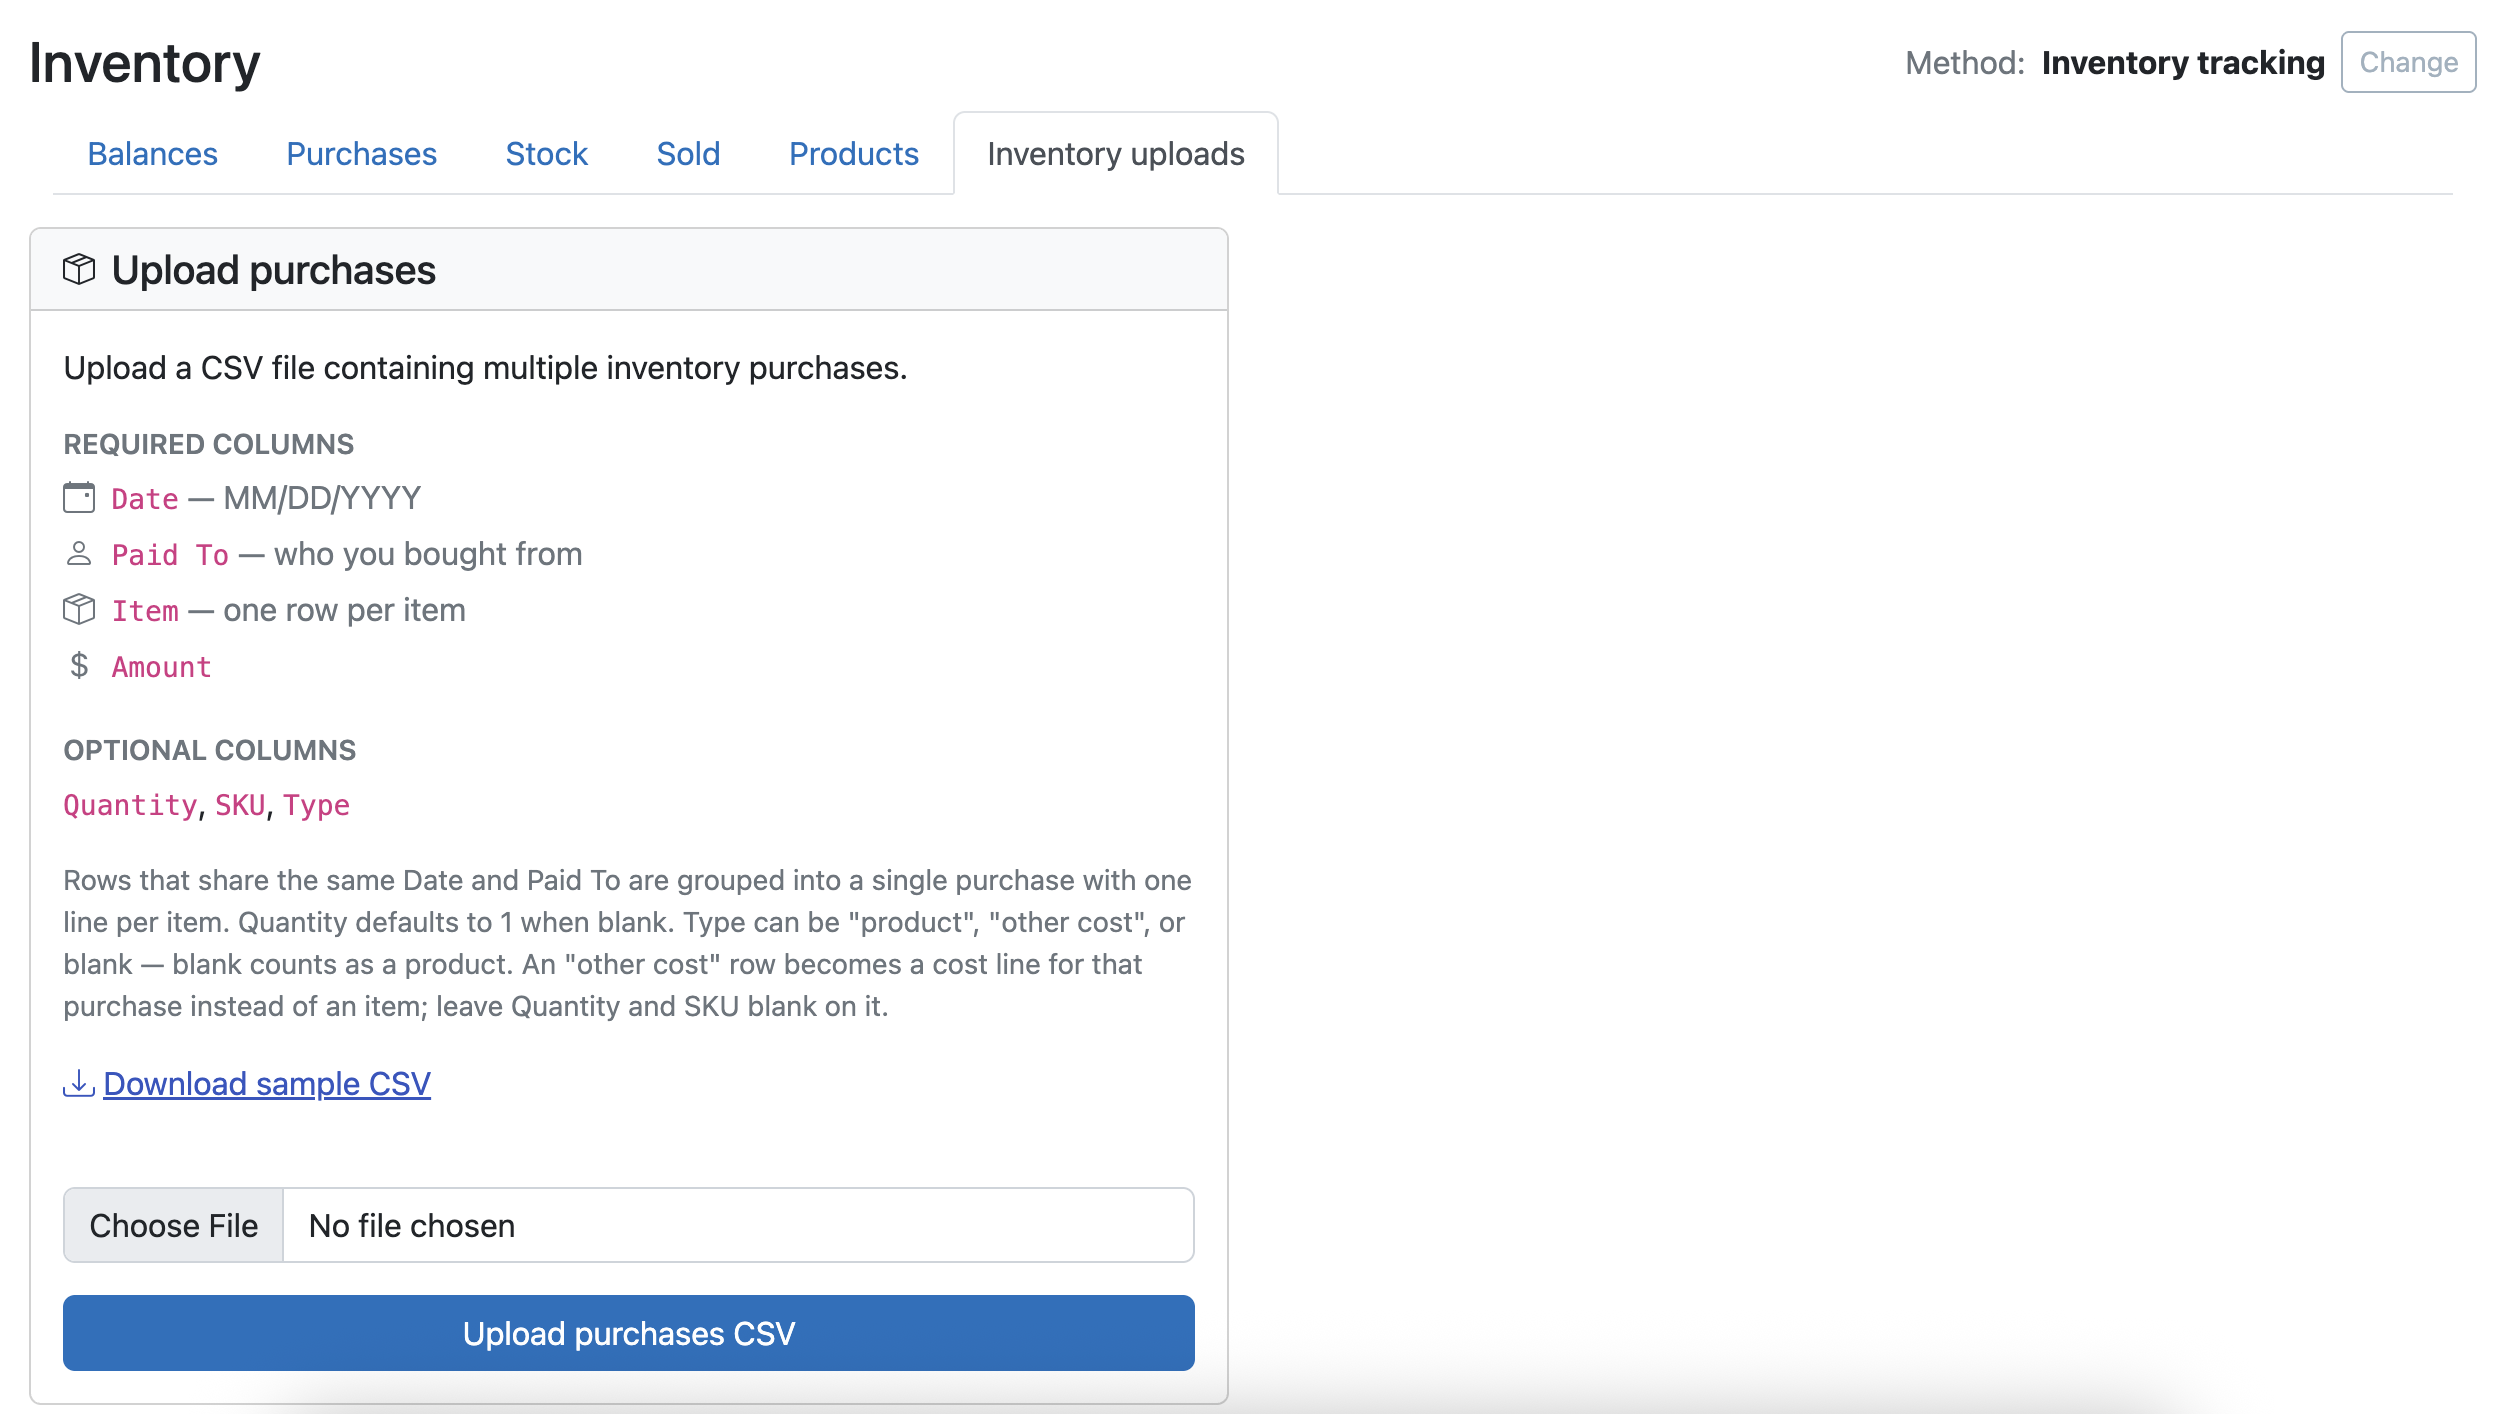
Seller Ledger will create a separate inventory purchase transaction for each unique purchase in your file, with all of the items attached.
For a full walk-through of this option, including the exact column format and examples, check out our blog post: Load inventory costs from your spreadsheet.
For cash-based inventory tracking
If you're using cash-based inventory tracking — meaning you categorize inventory purchases as Cost of Goods Sold at the time you buy them, rather than tracking them as an asset — Seller Ledger now supports uploading a list of those purchases via CSV as well.
This is particularly useful if:
- You have a spreadsheet of inventory purchases from earlier in the year that you'd like to get into Seller Ledger.
- You paid for inventory in a way that isn't showing up in a connected bank or credit card account (for example, cash purchases at estate sales, thrift stores, or garage sales).
Option 3: Upload purchases as Cost of Goods Sold expenses
When you upload a list of purchases using this option, Seller Ledger will record each row as a Cost of Goods Sold expense on the date provided — no inventory asset tracking involved.
How to upload:
- Go to the Expenses tab (or the Cost of Goods Sold view, depending on how your account is set up).
- Click the Expense uploads sub-tab and choose the left section to Upload transactions.
- Choose your CSV file and click Upload transactions CSV.
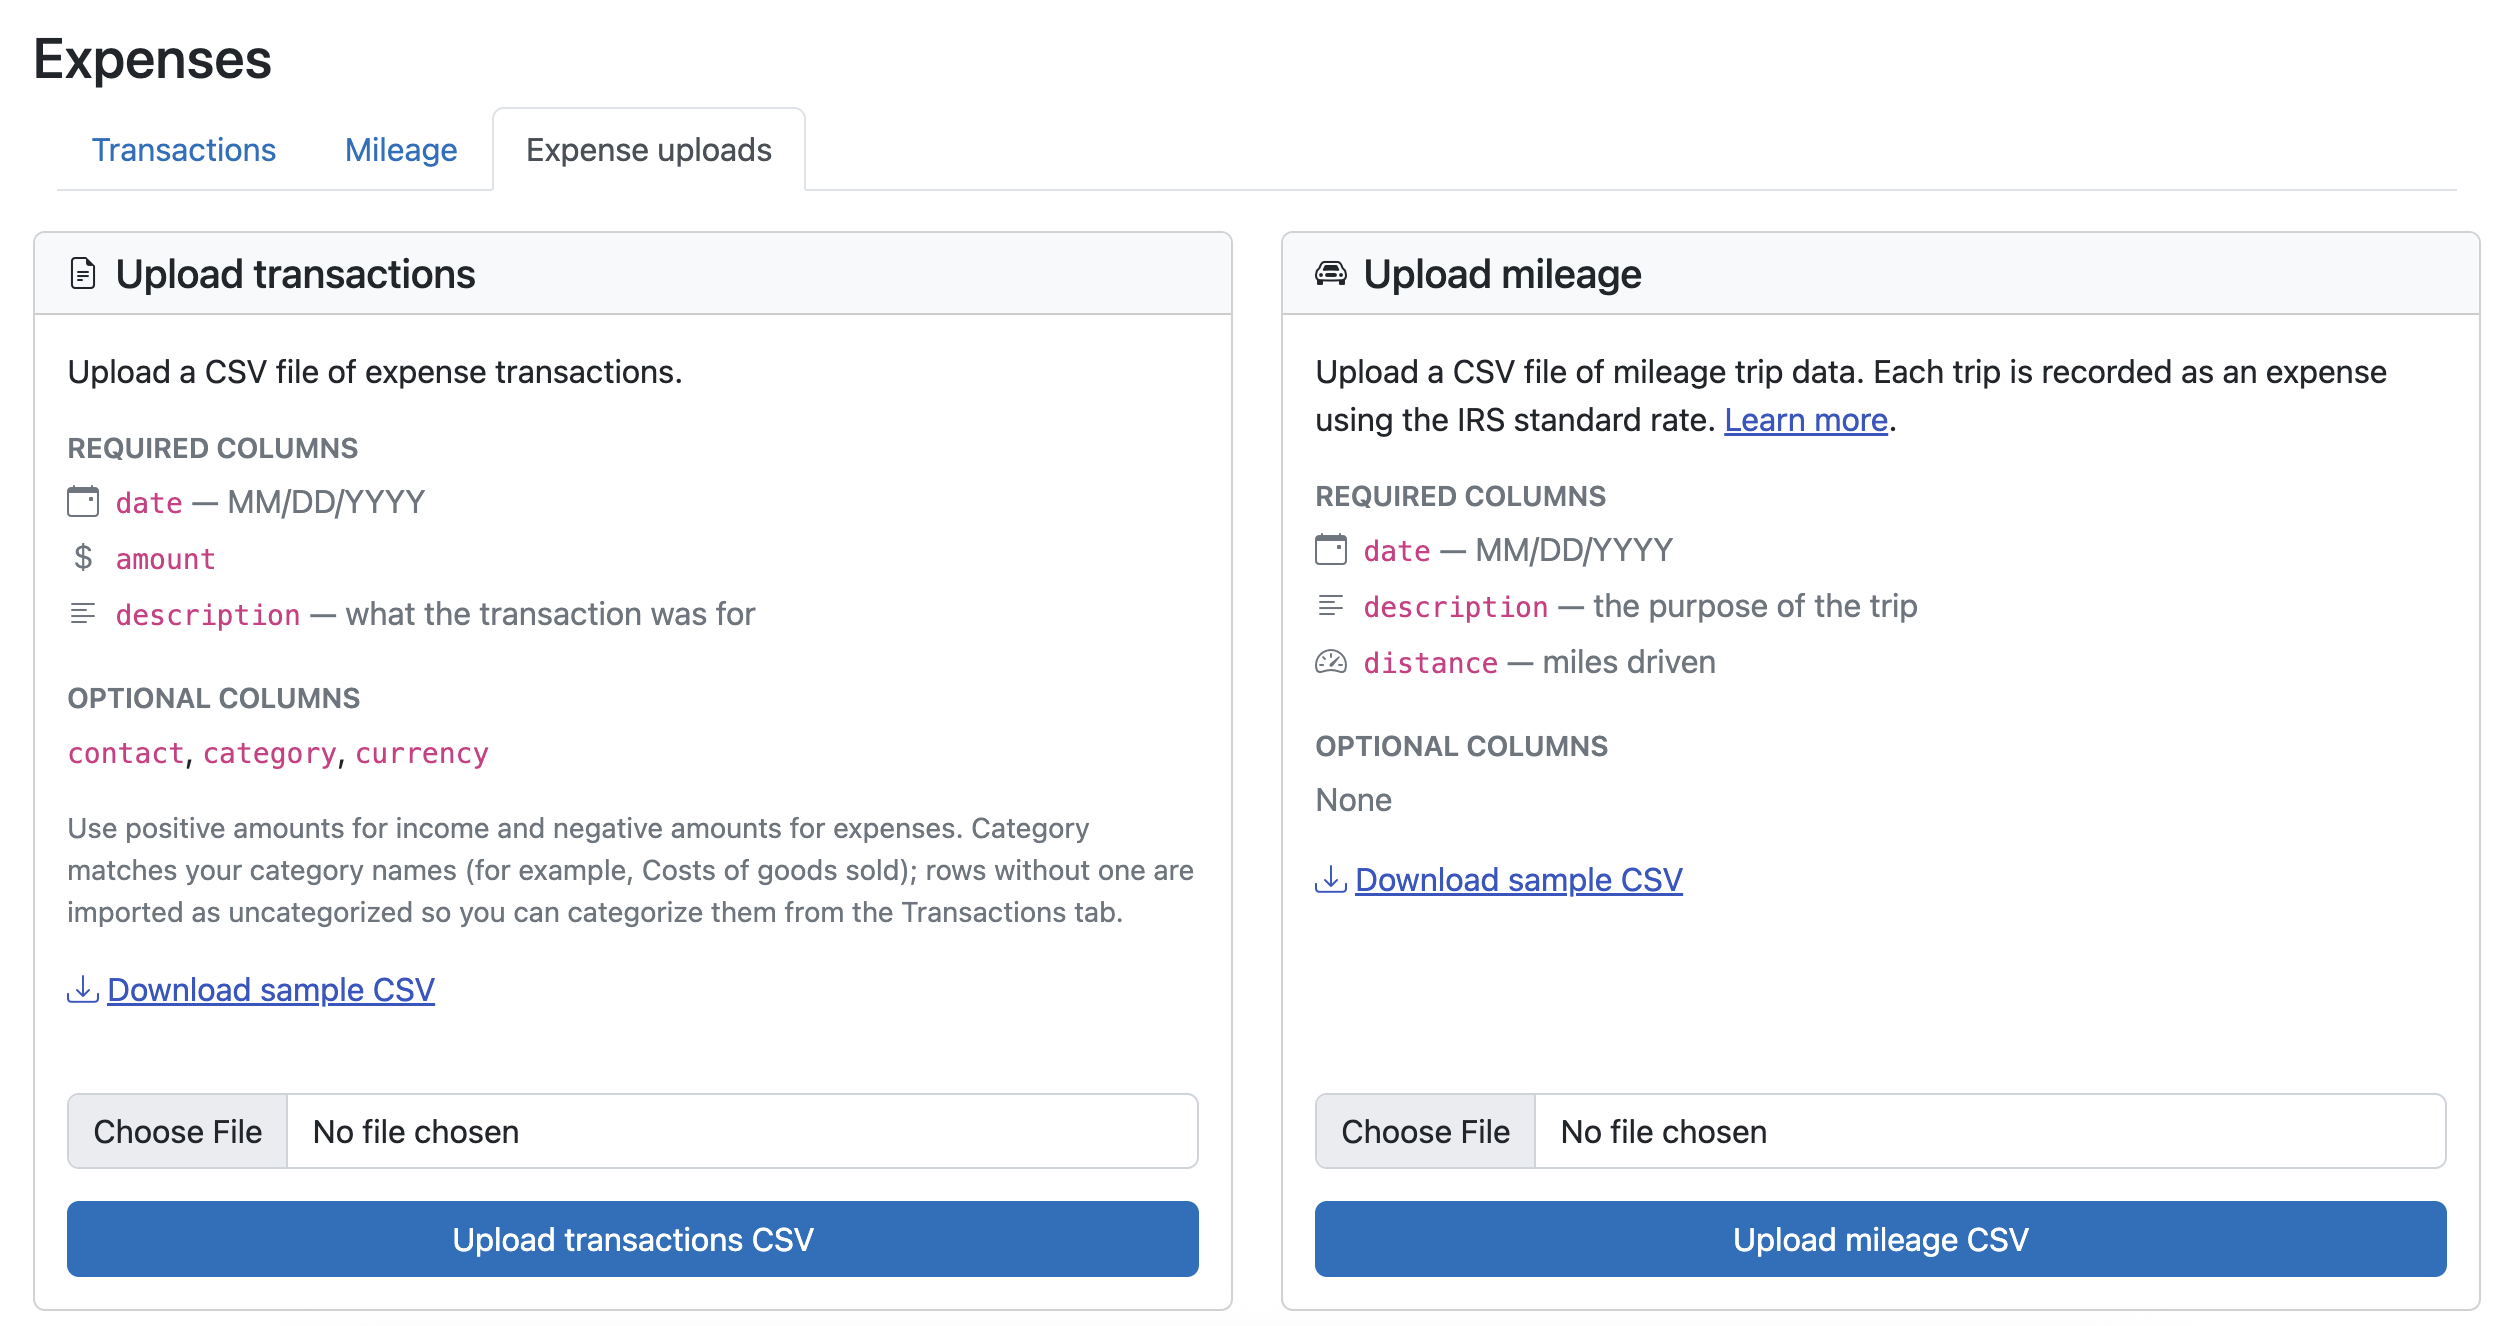
You'll want to make sure to include an option category column, and include the category of Cost of Goods Sold in each row.
Each row in your file will show up as an individual expense transaction categorized as Cost of Goods Sold, and will flow through to your Profit & Loss report and Line 4 of your Schedule C.
Note: The IRS does not permit changing inventory accounting methods mid-year without permission. If you're unsure whether cash-based or continuous tracking is right for you, we recommend talking to a tax professional before making a switch. See Can I turn off inventory tracking and go back to using cost of goods sold as a category? for more.
Quick summary
| Your situation | Which option to use |
|---|---|
| You're tracking inventory at the item level and want to add items to one existing purchase or your opening inventory balance | Option 1 — Upload item details for a single purchase |
| You're tracking inventory at the item level and want to load many purchases at once (great when switching from a spreadsheet) | Option 2 — Upload multiple inventory purchases |
| You're using cash-based tracking and want to bulk-load purchases as expenses | Option 3 — Upload purchases as Cost of Goods Sold |